Walkthrough: Create a Dataset on the Global Server
A Dataset defines which schema-backed data fields should be exported for a training project. In the Federated Learning Net network, the dataset is configured on the global frontend inside a training project.
The dataset does not upload raw clinic data to the global server. Instead, it stores an export design: which features should be requested from the participating local clinic nodes, how these features should be arranged, and how the resulting training table should be built.
A dataset is usually created after a project has already been linked to a query. The query defines which patients are selected. The dataset defines which fields are exported for those patients.
| Concept | Meaning |
|---|---|
| Query | Selects the patient subset, for example all patients where Age exists |
| Dataset | Selects and arranges the fields/features exported for that patient subset |
| Feature | A column in the final training dataset |
| Data selection | A schema-backed source field that can be added to a feature |
| Export mode | Defines how selected data is transformed into the final table layout |
| Preview | Shows a sample of the resulting dataset before it is used in a run |
The dataset workflow is intentionally separated from the query workflow. This keeps patient selection and feature selection explicit and reviewable.
Step 1 — Open the Data Step of a Project
Open the training project and go to 2. Data.
If no dataset has been configured yet, the page shows an empty state. Click Create new dataset to open the dataset builder.
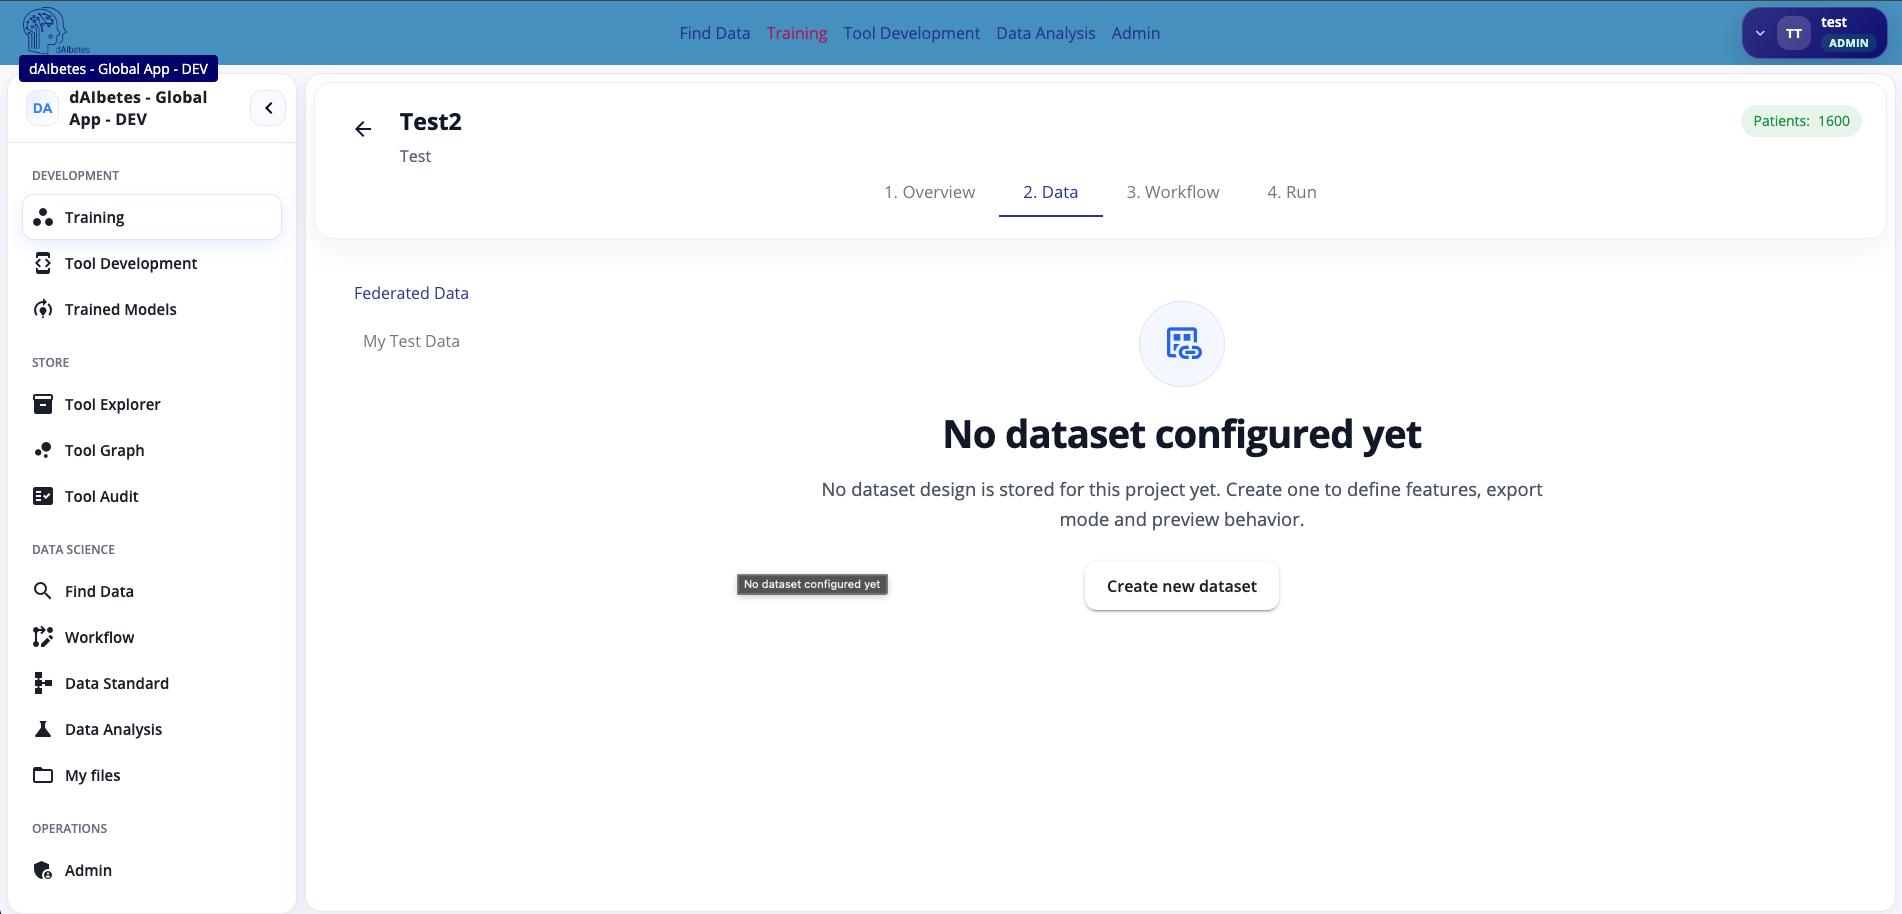
Datasets are configured inside the project because the available data selections depend on the linked query and the participating clinic responses.
The query decides which patients are eligible. The dataset decides which variables should be exported for those patients.
Step 2 — Review the Dataset Builder Overview
After clicking Create new dataset, the dataset builder opens.
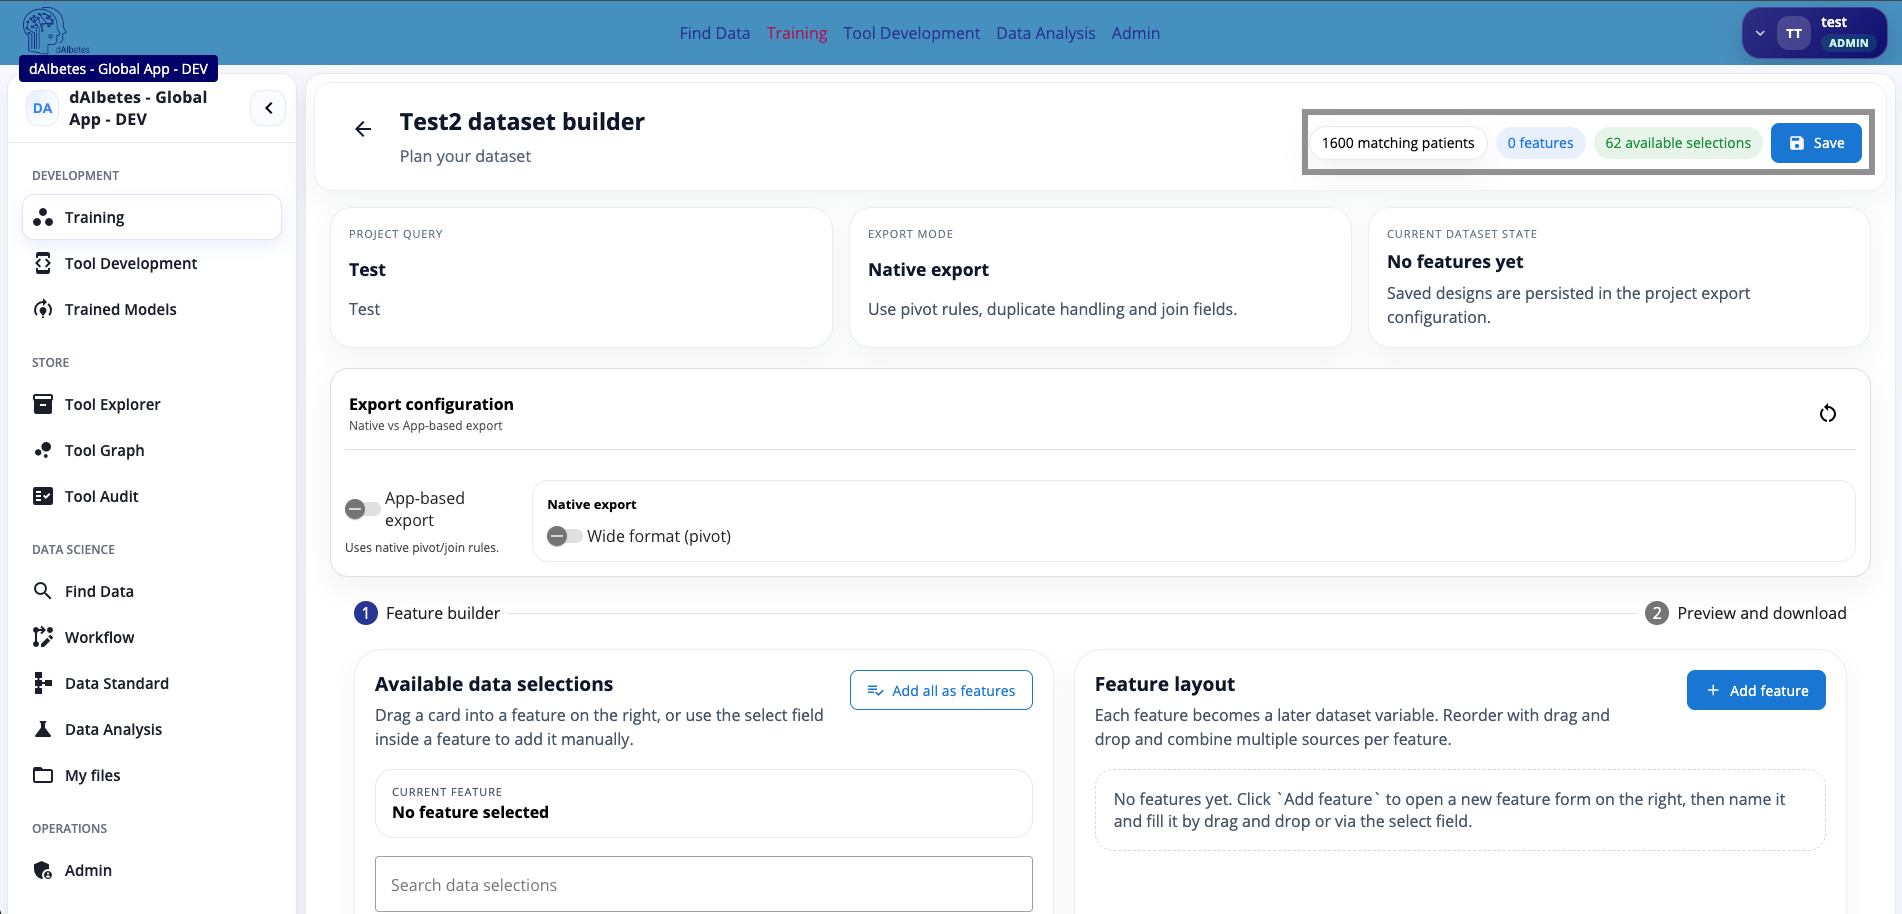
At the top of the page, the builder summarizes the current dataset state.
| Indicator | Meaning |
|---|---|
| Matching patients | Number of patients selected by the linked query |
| Features | Number of configured output columns in the dataset |
| Available selections | Number of schema-backed fields available for feature construction |
| Save | Persists the current dataset design in the project |
The main page is divided into three conceptual areas:
| Area | Purpose |
|---|---|
| Project Query | Shows the query that defines the patient subset |
| Export Mode | Defines how selected fields are converted into a training table |
| Feature Builder | Lets you select fields and arrange them as output features |
In the example, the project has 1600 matching patients, 0 configured features, and 62 available selections.
The patient count is based on the linked query and may be privacy-filtered. It should be interpreted as an availability estimate, not necessarily as an exact raw database count.
Before adding features, check whether the query and matching patient count are plausible. A dataset built on the wrong query will export the wrong patient population.
Step 3 — Add Features to the Dataset
The lower part of the builder contains the Feature builder.
On the left side, Available data selections lists schema-backed fields that can be exported. Each card describes one available field, including its clinical meaning, datatype, ontology code, and clinic coverage.
On the right side, Feature layout defines the columns that will appear in the final dataset.
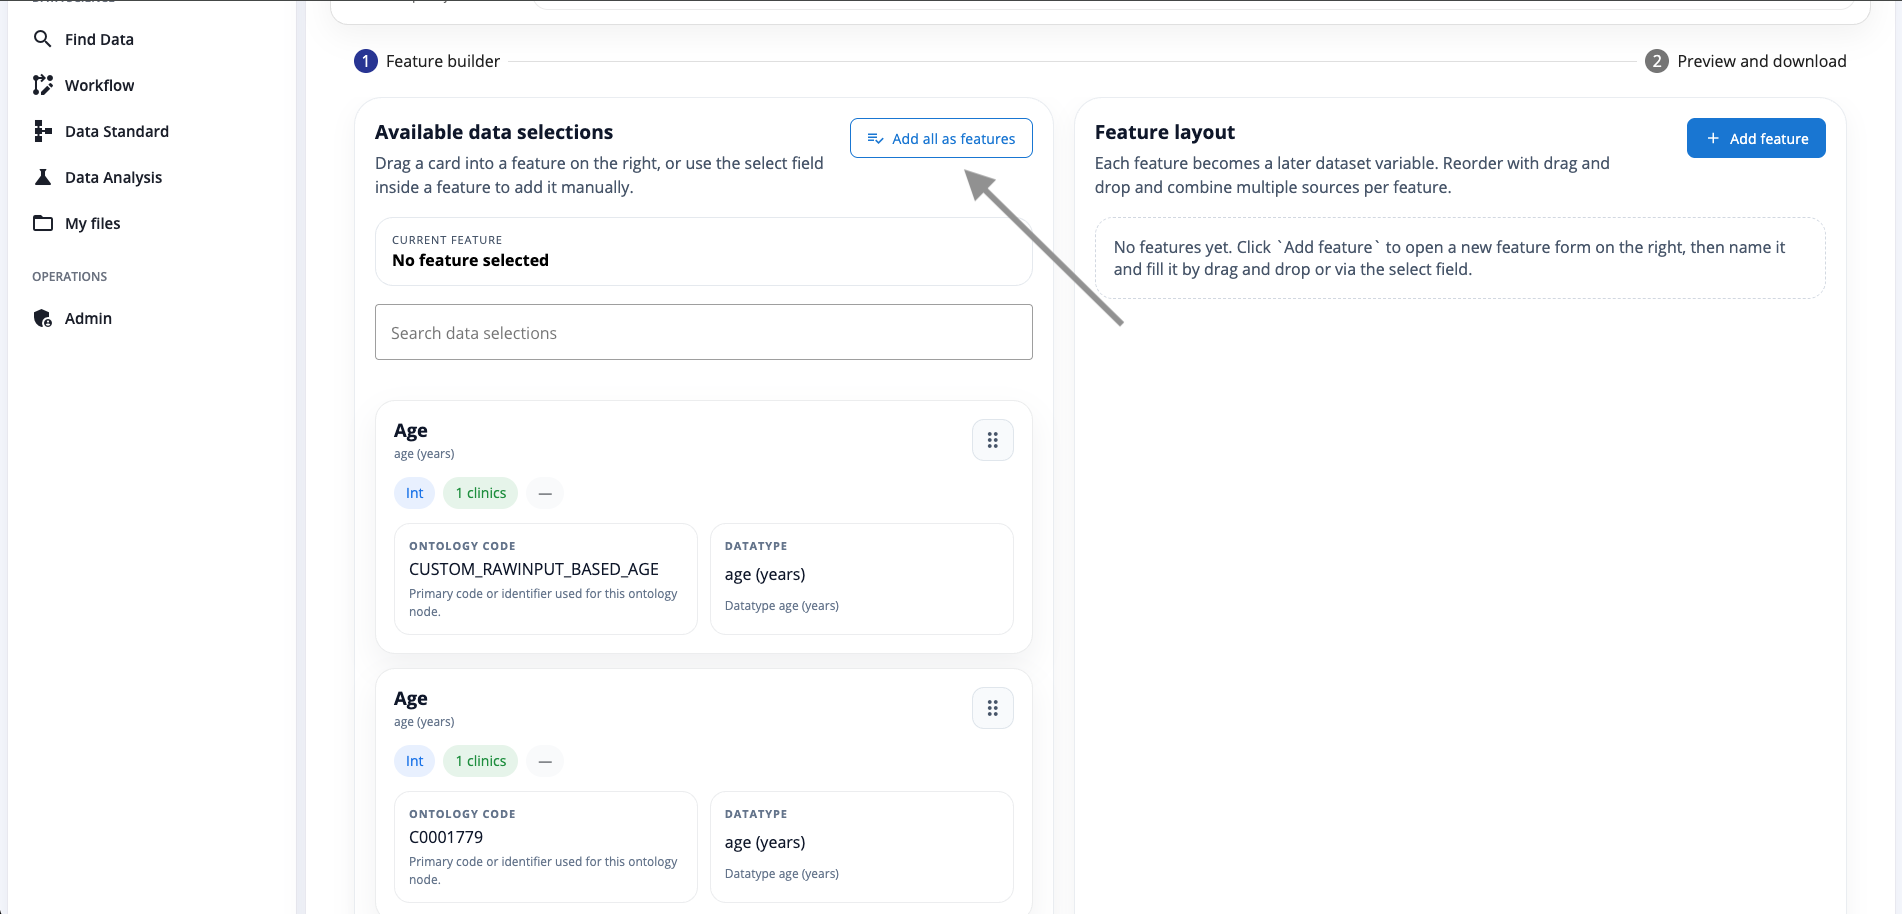
There are two main ways to add features:
| Option | When to use it |
|---|---|
| Add all as features | Use this when you want to quickly export all available fields as separate columns |
| Add feature | Use this when you want to manually define selected features, rename them, or combine multiple data selections into one feature |
For a first test with the US-130 example, Add all as features is often the fastest option because it creates one output feature per available schema field.
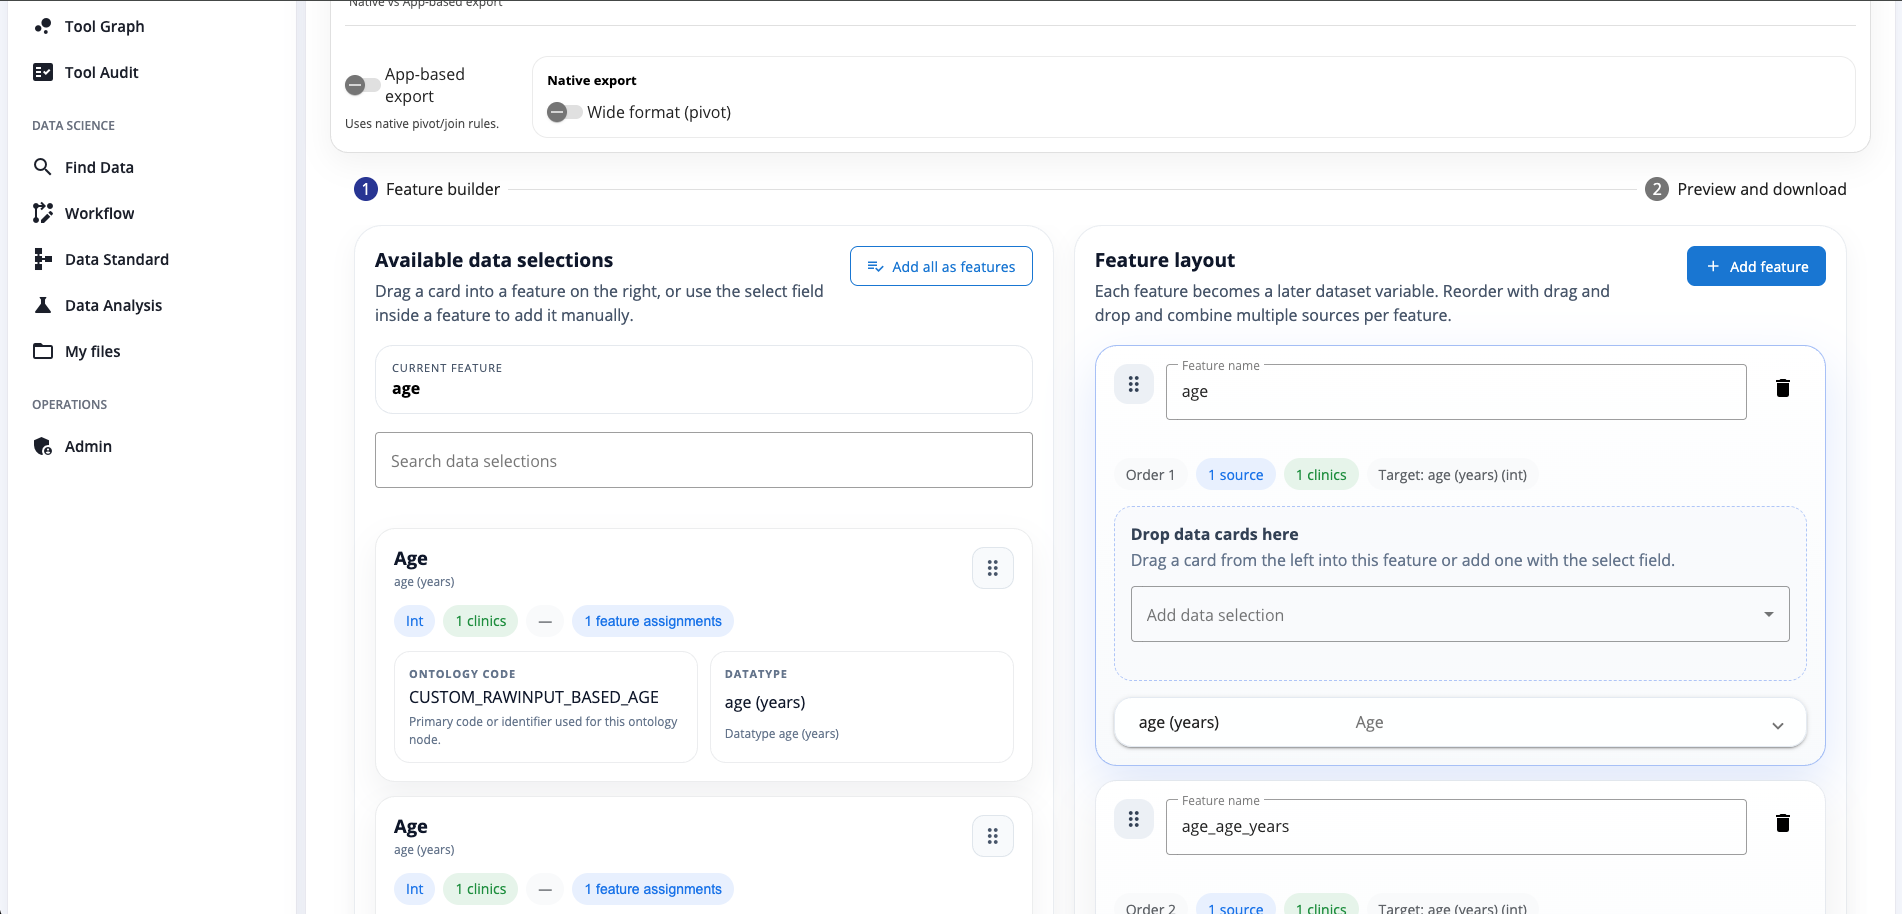
After adding features, each feature appears in the Feature layout panel. A feature can be renamed, reordered, removed, or filled with one or more data selections.
Each feature card shows:
| Element | Meaning |
|---|---|
| Feature name | The column name that will appear in the exported dataset |
| Order | The feature order in the exported table |
| Source count | Number of data selections used to build this feature |
| Clinic coverage | Number of clinics that can provide this field |
| Target datatype | The datatype expected for the resulting feature |
A feature is the final exported variable. A data selection is the schema-backed source field used to populate that variable.
For quick prototyping, add all fields as features. For production training, curate the feature list manually so that the model receives only meaningful, stable, and permitted variables.
Step 4 — Configure the Export Mode
The Export configuration controls how the selected features are converted into a table for the app or workflow.
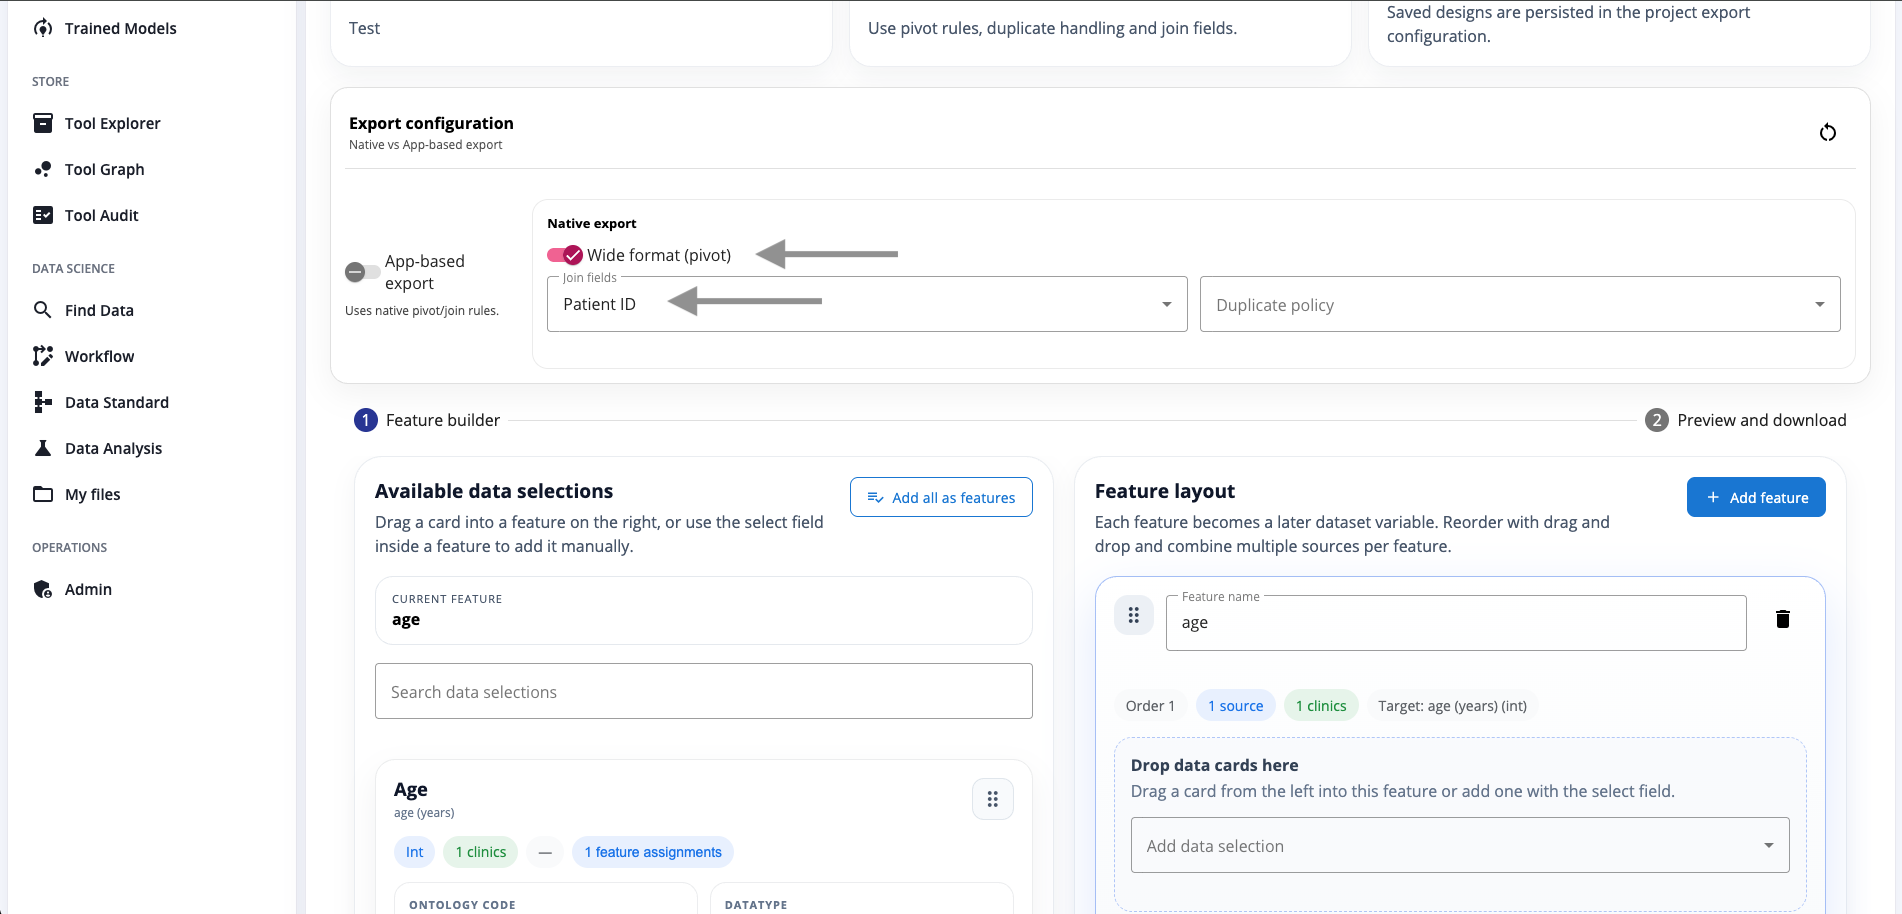
There are two main export concepts:
| Setting | Meaning |
|---|---|
| App-based export | Uses the export format expected by the selected app or workflow |
| Native export | Uses platform-native pivot and join rules to build the dataset table |
| Wide format / pivot | Converts selected schema values into one row per entity, with features as columns |
| Join fields | Defines how records are joined across selected features, for example by patient ID |
| Duplicate policy | Defines how repeated values are handled when more than one value exists for the same feature and join key |
For typical tabular machine learning, use Native export with Wide format (pivot) enabled. This produces a standard training table where each row represents a patient or entity, and each selected feature becomes a column.
For the US-130 example, choose Patient ID as the join field. This means the exported table is assembled around patient-level records.
The duplicate policy should be selected based on the data semantics. If a field can appear more than once per patient, the platform needs to know how to handle repeated values. Depending on the available options, this may mean keeping the first value, keeping the latest value, aggregating values, or rejecting ambiguous duplicates.
The export configuration is important because schema data can be graph-like or longitudinal, while most machine learning tools expect a rectangular table.
Use wide format with patient ID as the join field when your app expects one row per patient. Review duplicate handling carefully if the source data contains repeated measurements or visits.
Step 5 — Preview and Download the Dataset
After selecting features and configuring the export mode, open the Preview and download section.
Click Refresh preview to generate a preview of the dataset based on the current builder configuration.
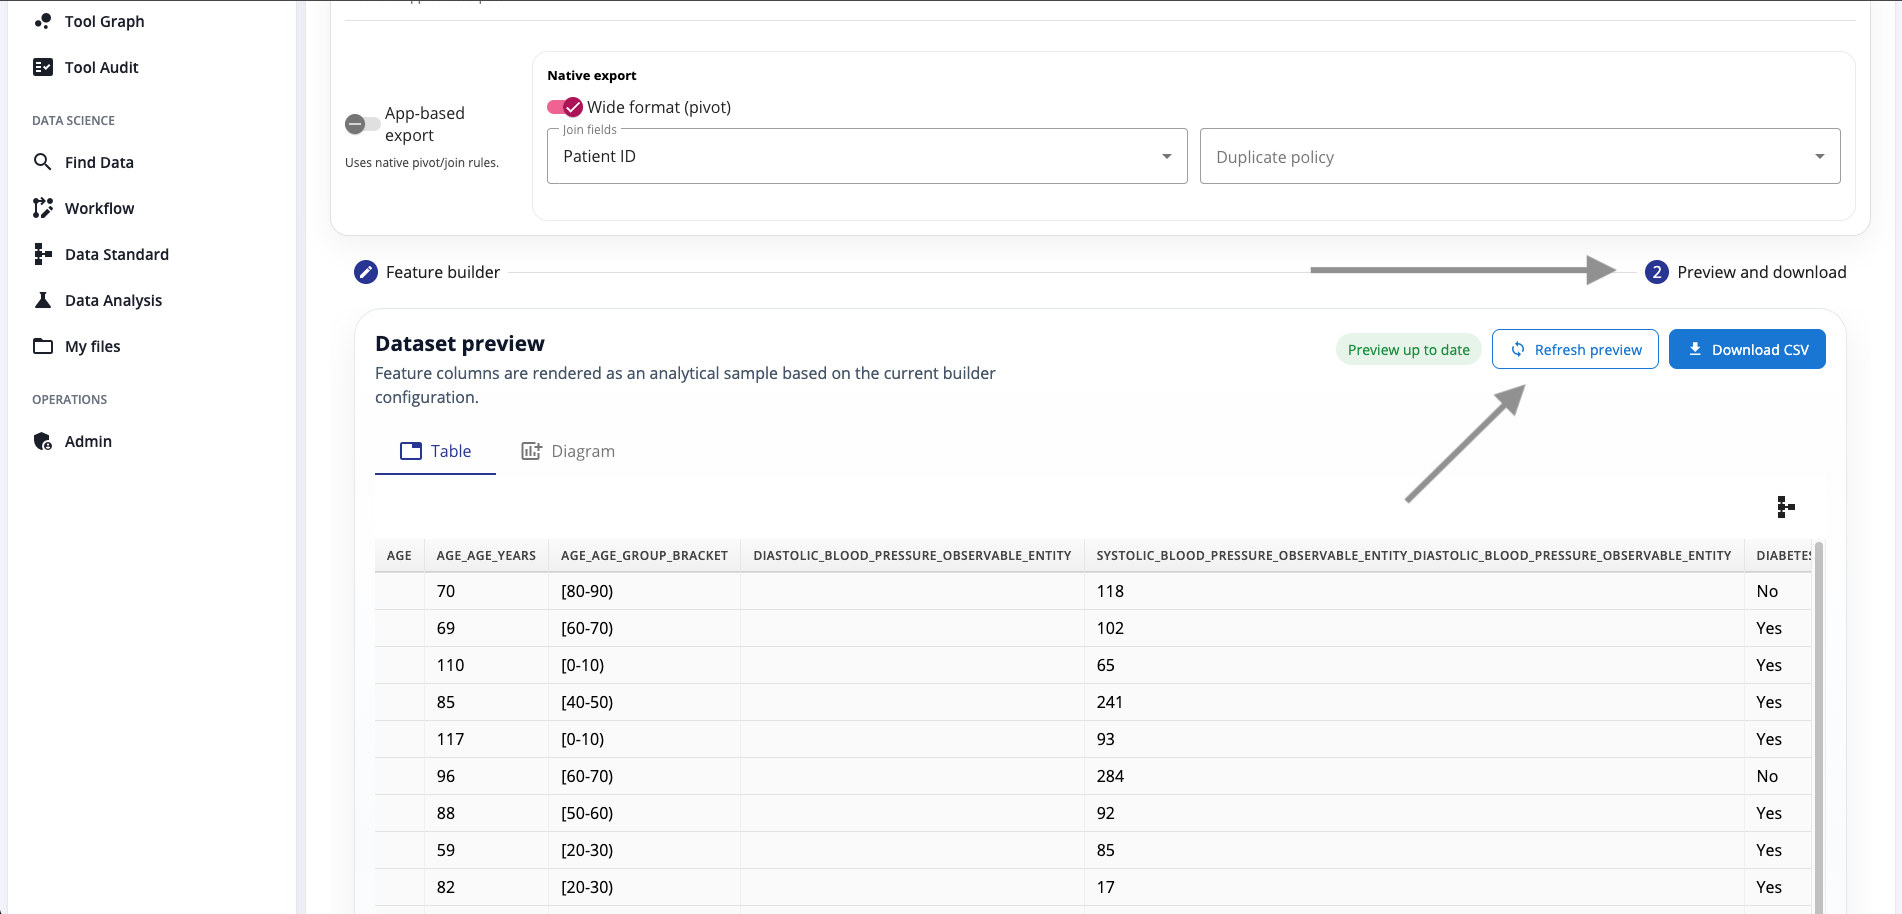
The preview shows how the final exported table will look. It includes the generated feature columns and sample rows from the selected patient population.
Use the preview to check:
| Check | Why it matters |
|---|---|
| Column names | These are the names the app will receive |
| Row structure | Confirms whether the export is patient-level, visit-level, or another layout |
| Feature values | Helps identify missing, malformed, or unexpected values |
| Target column | Confirms that the training label is present if the app requires one |
| Duplicate handling | Helps detect repeated or collapsed values |
| Schema coverage | Shows whether selected features are actually populated |
You can also use Download CSV to download the generated preview or exported table where allowed.
The preview is generated from the current dataset builder configuration. If you change features, export mode, join fields, or duplicate policy, refresh the preview again.
Never start a training run without checking the dataset preview. The preview is the final sanity check before the workflow receives the data.
Step 6 — Save the Dataset Design
When the feature list, export mode, and preview look correct, click Save.
Saving persists the dataset design in the project export configuration. This means the project can use the same dataset definition later when a federated run is started.
The saved dataset design includes:
- selected features,
- feature names and order,
- source data selections,
- export mode,
- join fields,
- duplicate handling,
- preview/export behavior.
Saving the dataset does not start a run. It only stores the dataset design for the project.
A saved dataset is the reusable data contract between the linked query and the project workflow.
How Datasets Work at Runtime
At runtime, the platform uses the dataset definition together with the linked query and workflow.
The process is:
- The project query defines the eligible patient subset.
- The dataset defines which schema-backed fields are needed.
- Each participating clinic resolves the query locally.
- The selected fields are exported locally according to the dataset configuration.
- The exported data is passed into the workflow input.
- The trainable app receives the dataset in the format expected by its input contract.
This design separates the three major concerns:
| Concern | Defined in |
|---|---|
| Which patients are included? | Query |
| Which fields are exported? | Dataset |
| Which computation is executed? | Workflow |
This separation is deliberate. It makes the federated process easier to inspect, reuse, and audit. It also avoids hiding important choices inside tool code. A user can review the patient selection, the feature selection, and the workflow independently before starting a federated run.
Continue with the Run walkthrough to start the federated execution.