Walkthrough: Create a Project on the Global Server
A Project is the top-level workspace for a federated training or prediction process. It brings together the project metadata, a query-based patient selection, and a workflow that defines which tool or tools should be executed.
Projects are created on the global frontend. The global server coordinates the training process, while the actual data remains inside the participating local clinic nodes.
A project usually connects three things:
| Concept | Meaning |
|---|---|
| Project | The global training workspace that stores the name, description, linked query, workflow, and later run history |
| Query | Defines which patients are eligible for the project. The query is created in the Query walkthrough |
| Workflow | Defines which app or sequence of apps should run on the selected data |
| Run | Executes the configured workflow against the participating clinic nodes. Runs are explained in the Run walkthrough |
The dataset configuration is handled separately in the Dataset walkthrough. This page focuses on creating the project and preparing its workflow.
Step 1 – Open the Training Projects Section
In the global server frontend, open Training from the navigation.
You will see the My Training Projects page. This page lists all training projects you have access to. Each row shows the project name, creation time, description, and current status.
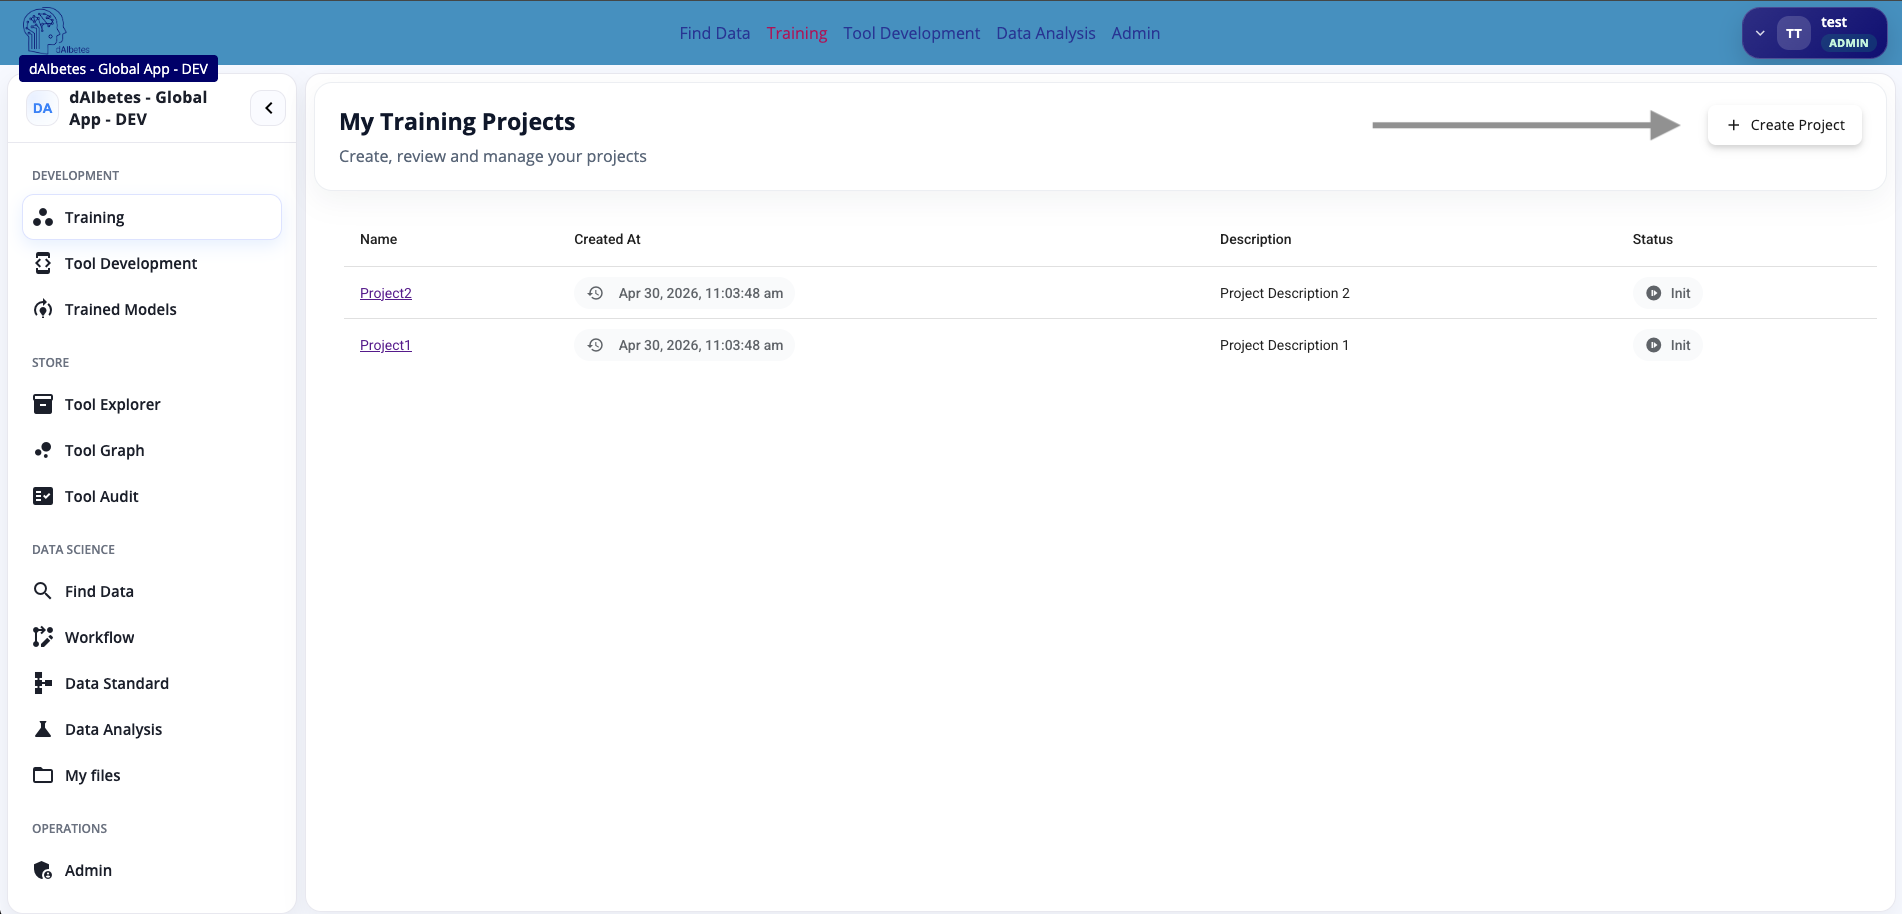
Click Create Project to start a new project.
Projects are created on the global server. They coordinate federated workflows, but they do not copy raw clinic data to the global server.
Use a project whenever you want to organize a complete federated training task: patient selection, workflow configuration, and later execution runs.
Step 2 — Create a New Project
The Create New Project dialog asks for basic project information.
Fill in:
| Field | Description |
|---|---|
| Project Name | A clear name for the federated training project |
| Description | A short explanation of the project purpose |
| I accept the process | Confirms that the project information may be shared with participating hospitals |
| Link Query | Optional query that defines the patient population for this project |
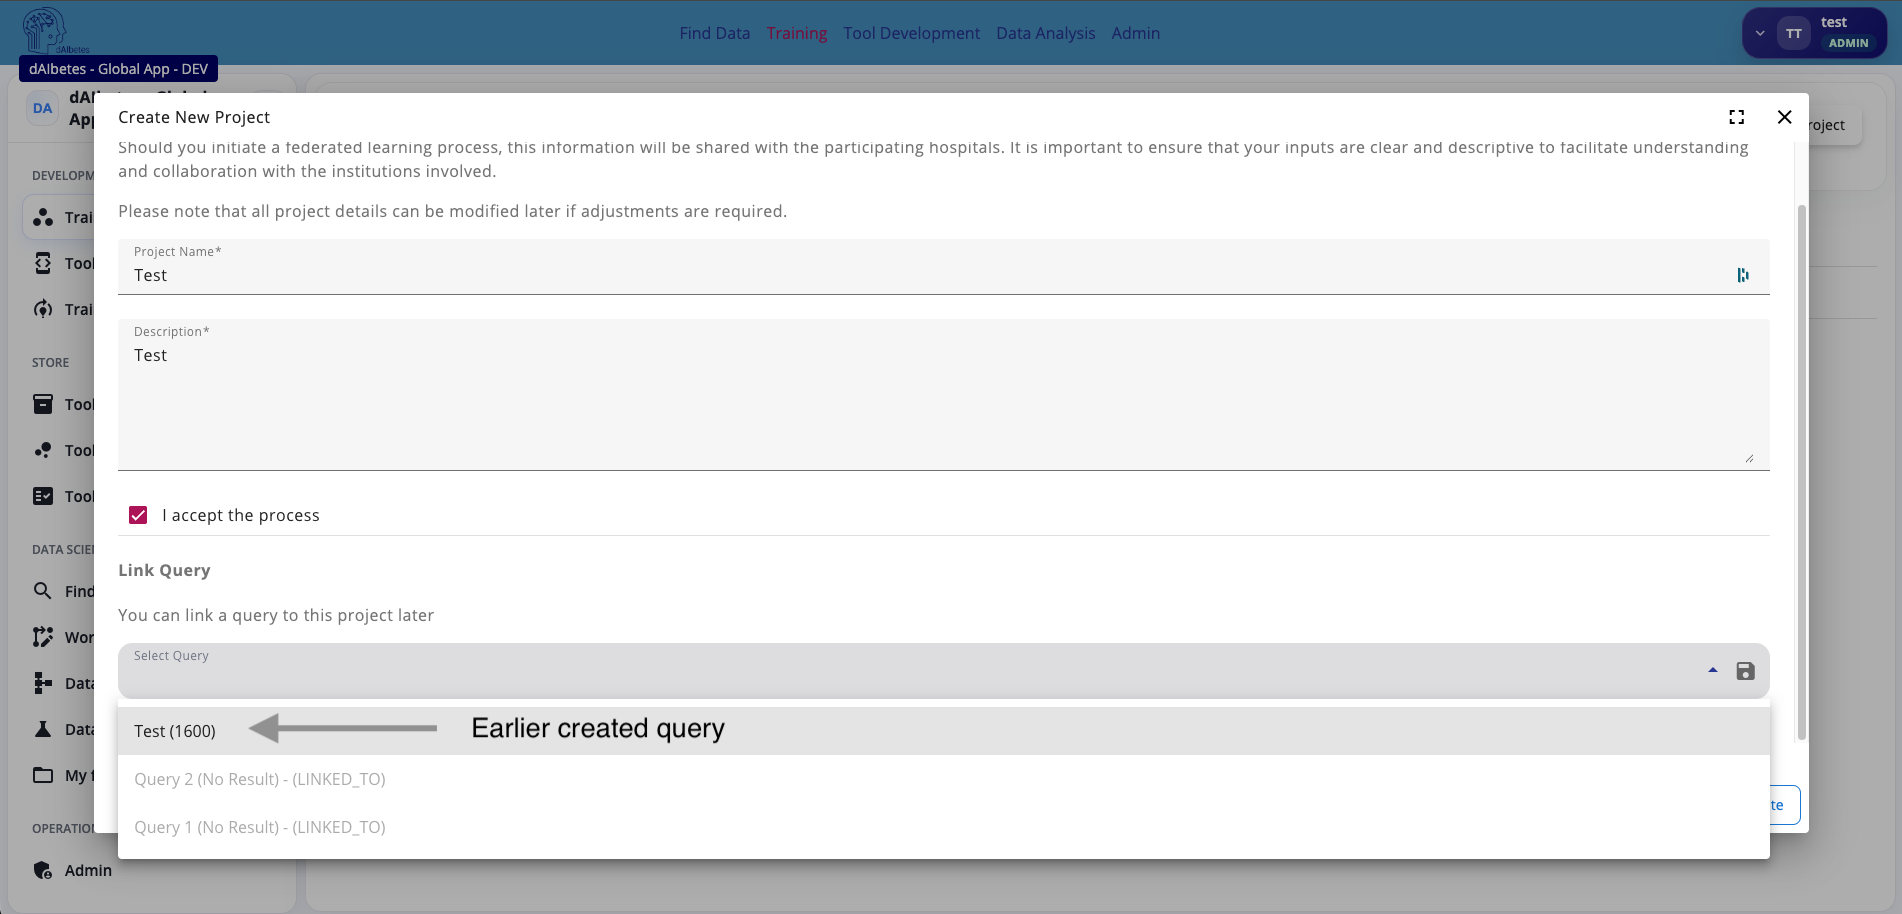
The linked query is used to define how many patients are available for the project and which patient subset the project should operate on. In the example, the project is linked to an earlier created query with a privacy-filtered result of 1600 patients.
You can also link or change the query later from the project detail page.
The project name and description should be understandable for participating clinics. These details may be visible to institutions involved in the federated process.
Create the query before creating the project if you already know which patient subset should be used. Query creation is explained in the Query walkthrough.
Step 3 — Review the Project Detail Page
After creating the project, the project detail page opens.
The project detail page is organized into several steps:
| Step | Purpose |
|---|---|
| 1. Overview | Review and edit the project name, description, and linked query |
| 2. Data | Configure or review the dataset-related setup |
| 3. Workflow | Create the execution workflow and select the app to run |
| 4. Run | Start and monitor federated runs |
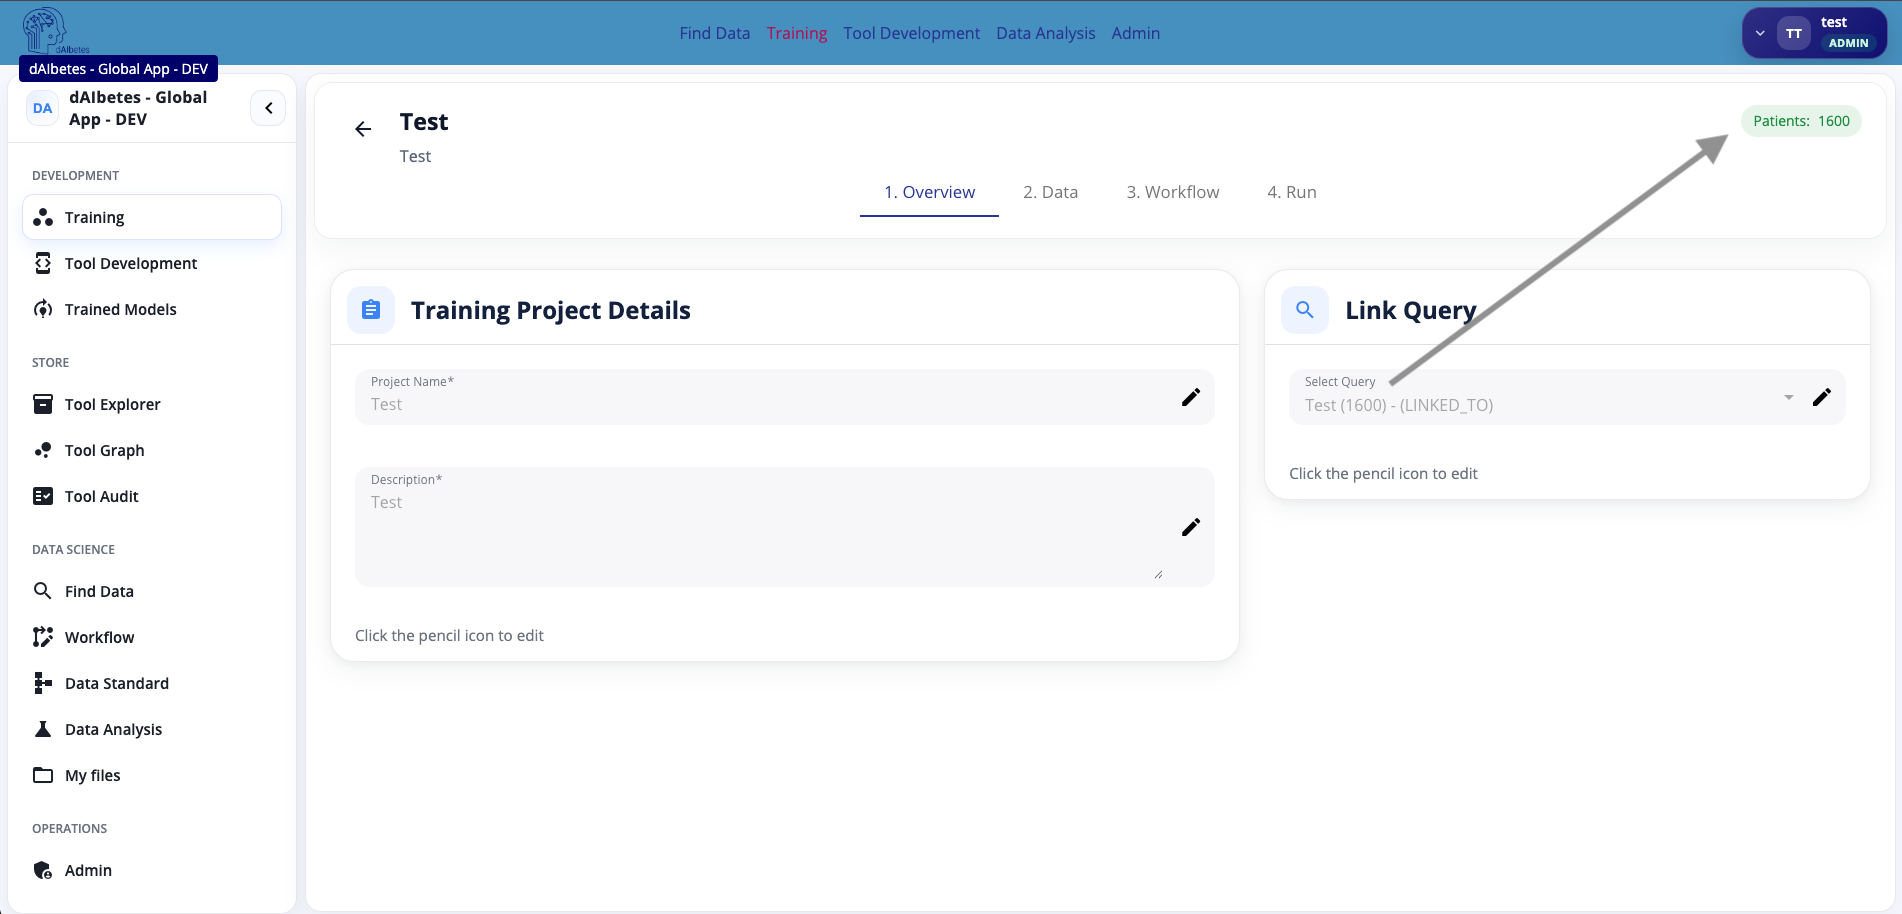
The Overview step shows the project metadata and the linked query. If a query is linked, the patient count badge in the top-right corner shows the current privacy-filtered patient count.
In the example, the project is linked to a query with 1600 patients.
The patient count shown in the project is based on the linked query result. As described in the query walkthrough, query counts are privacy-filtered and may be rounded or suppressed by local clinic privacy rules.
Before building the workflow, check whether the linked query and patient count match the intended training population.
Step 4 — Create the Workflow
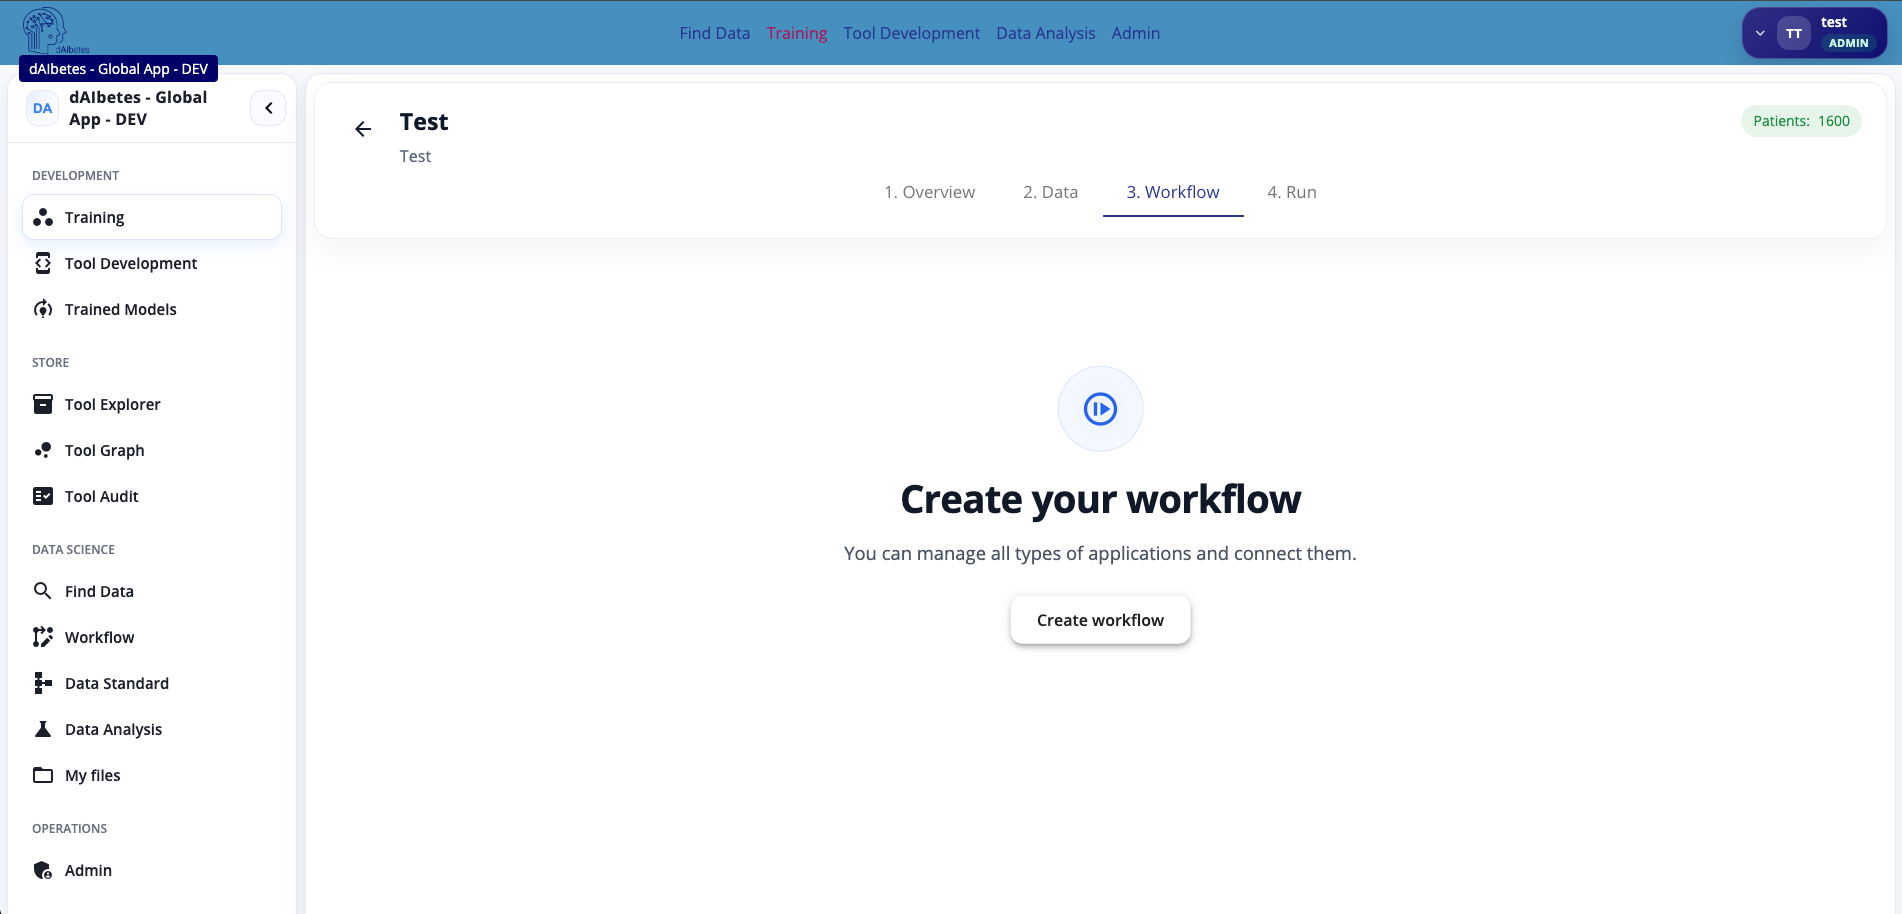
Open 3. Workflow. If no workflow exists yet, the page shows an empty state.
Click Create workflow.
The workflow editor opens as a graph canvas. The initial node represents the project input data, for example a CSV input named input-data.
This input node is the data entry point for the workflow. It represents the data selected by the linked query and prepared for the app execution.
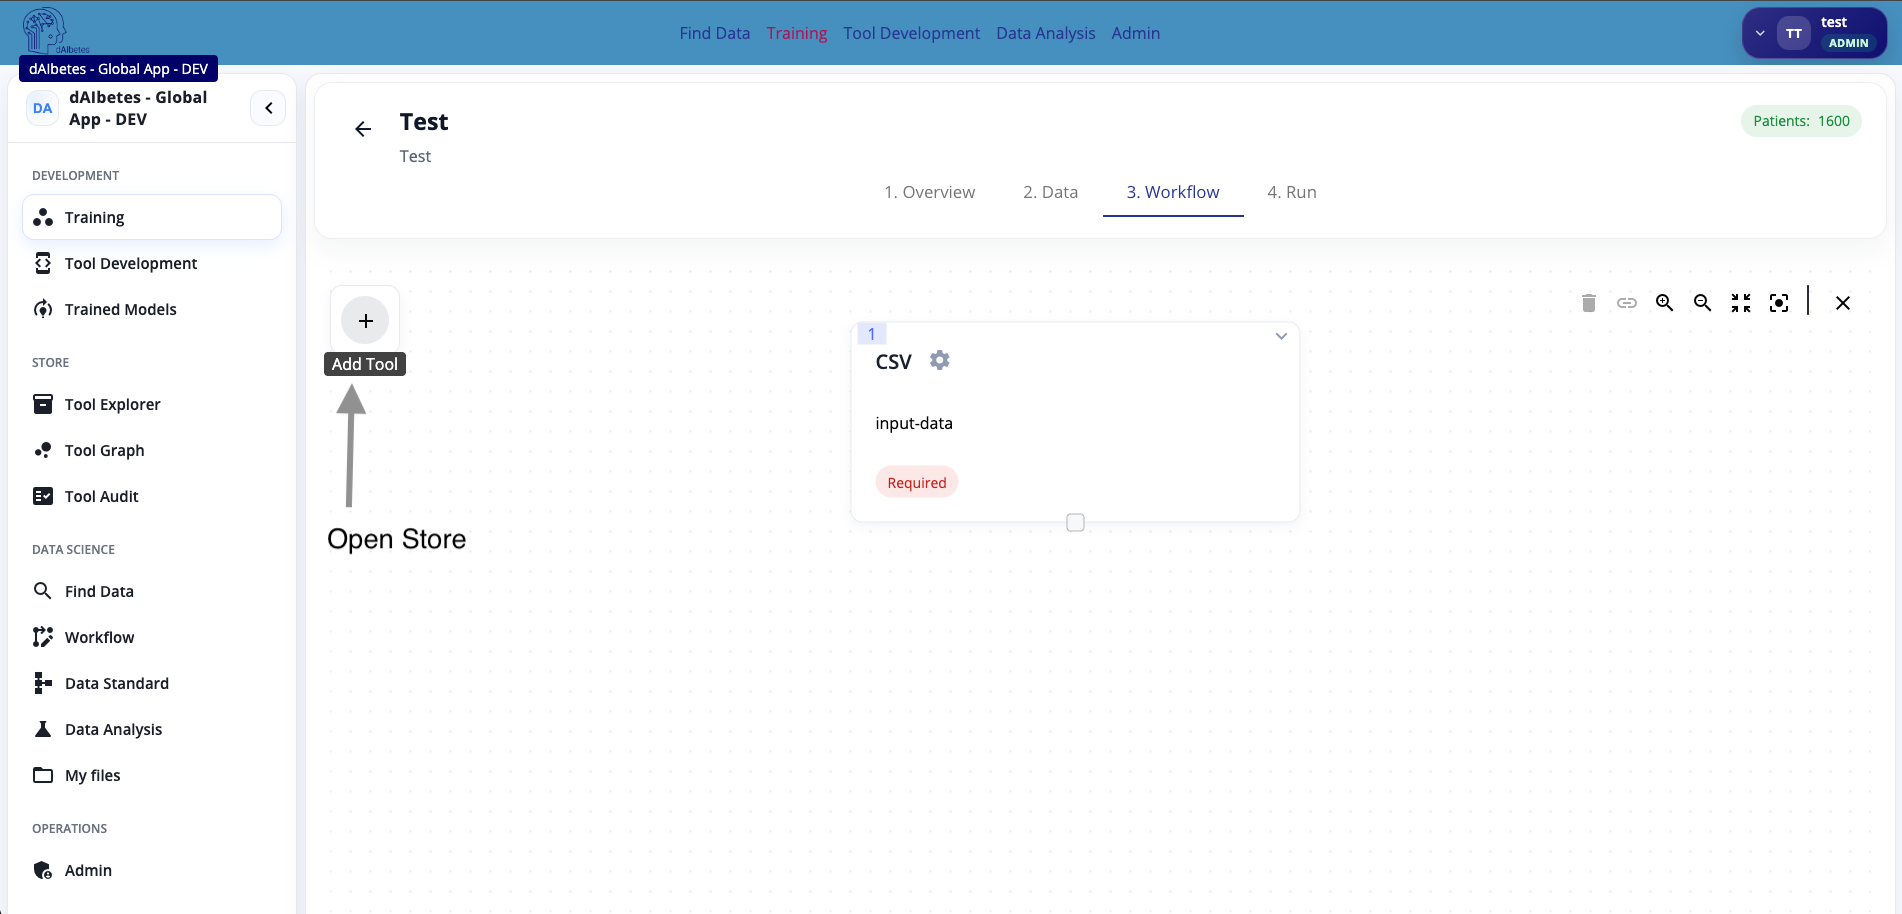
Click the plus button to open the Tool-Store and add an app to the workflow.
The workflow defines how data flows through the project. For a simple training project, the workflow often consists of one input node and one trainable app.
The workflow is the executable plan of the project. It connects the selected data to the tool that should process it.
Step 5 — Select the Tool
In the app selection dialog, search for the tool you want to use. For the US-130 example, search for us130 and select US130-Hospital Readmission Prediction.
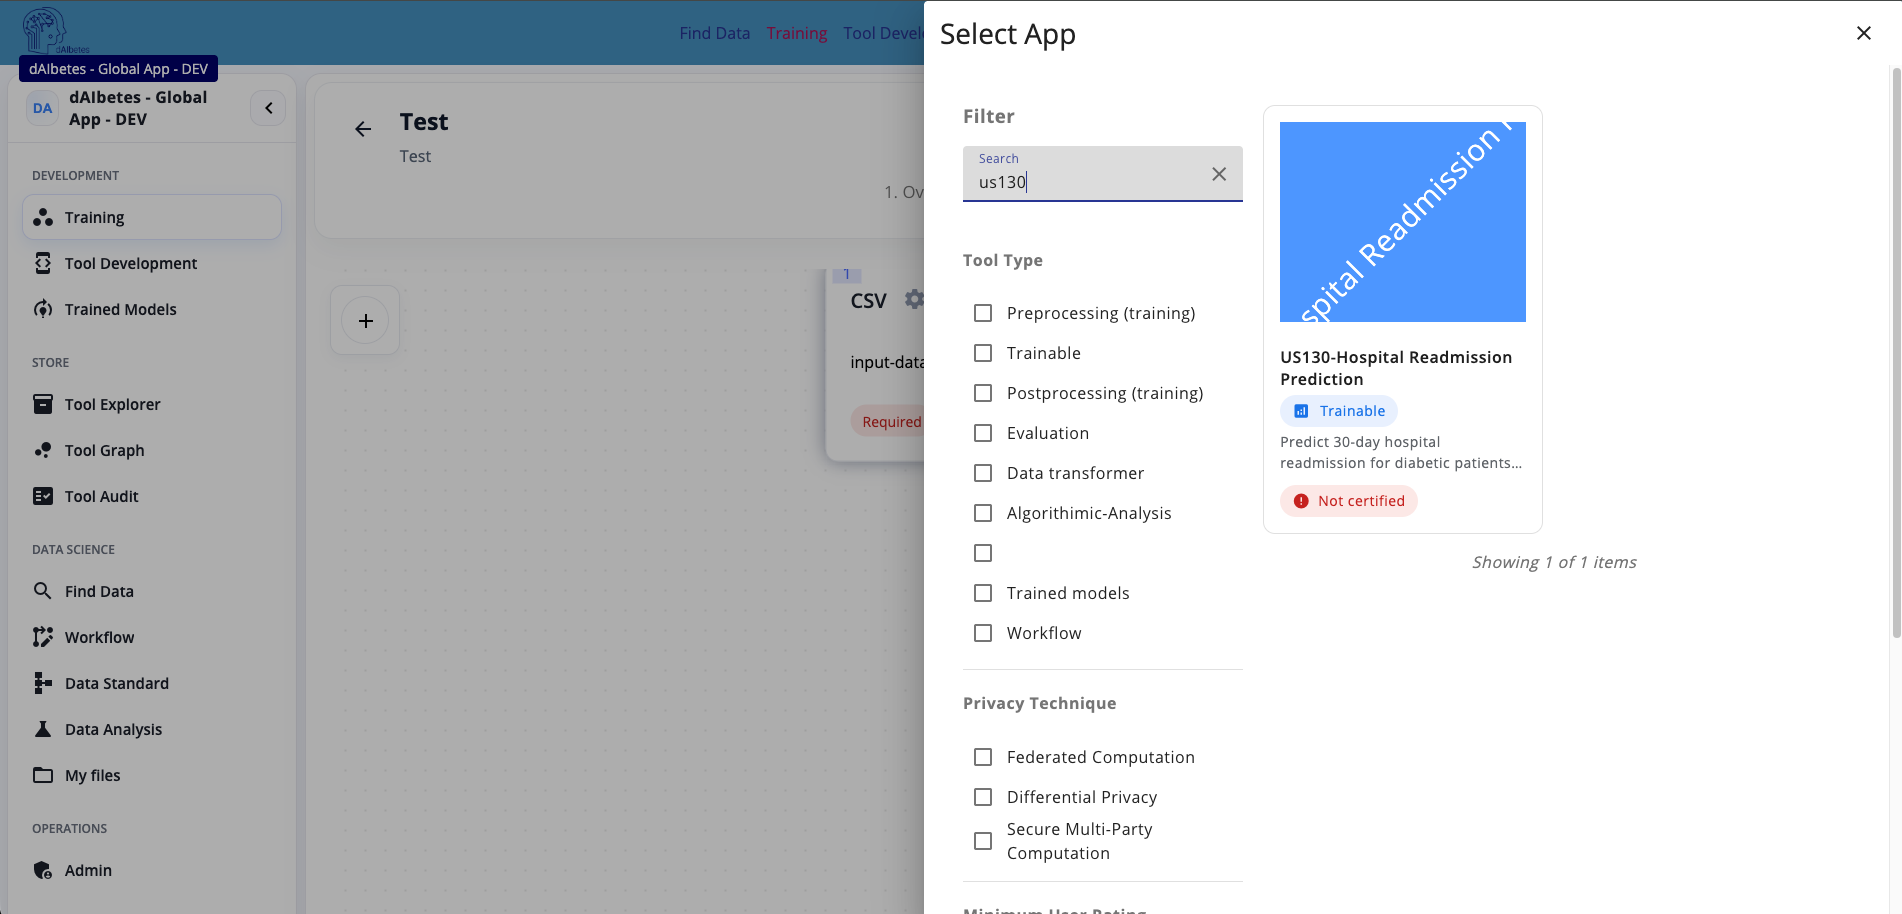
The app card shows important metadata, such as:
| Field | Meaning |
|---|---|
| Tool name | The app that will be added to the workflow |
| Tool type | For example Trainable |
| Certification status | Whether the app has been certified |
| Description | Short explanation of what the app does |
| Privacy technique | Optional filter metadata for privacy-related tool categories |
After selecting the tool, the tool setup view opens.
Select a tool whose input contract matches the project data. For example, if the workflow input is CSV data, the selected app must accept the corresponding CSV input.
Tool selection should be based on the task and the input/output contract, not only the tool name. Check whether the app is trainable and whether it accepts the expected input format.
Step 6 — Configure Tool Hyperparameters
The setup view shows the selected app and its configurable hyperparameters.
For the US-130 hospital readmission example, typical parameters include:
| Hyperparameter | Example value | Meaning |
|---|---|---|
max_iter | 1000 | Maximum number of solver iterations |
solver | lbfgs | Optimization algorithm |
class_weight | balanced | Handles class imbalance |
random_state | 42 | Controls reproducibility |
test_size | 0.2 | Fraction of data used for local validation |
target_column | hospital_readmission | Target label column |
standardize | Enabled | Applies feature standardization before training |
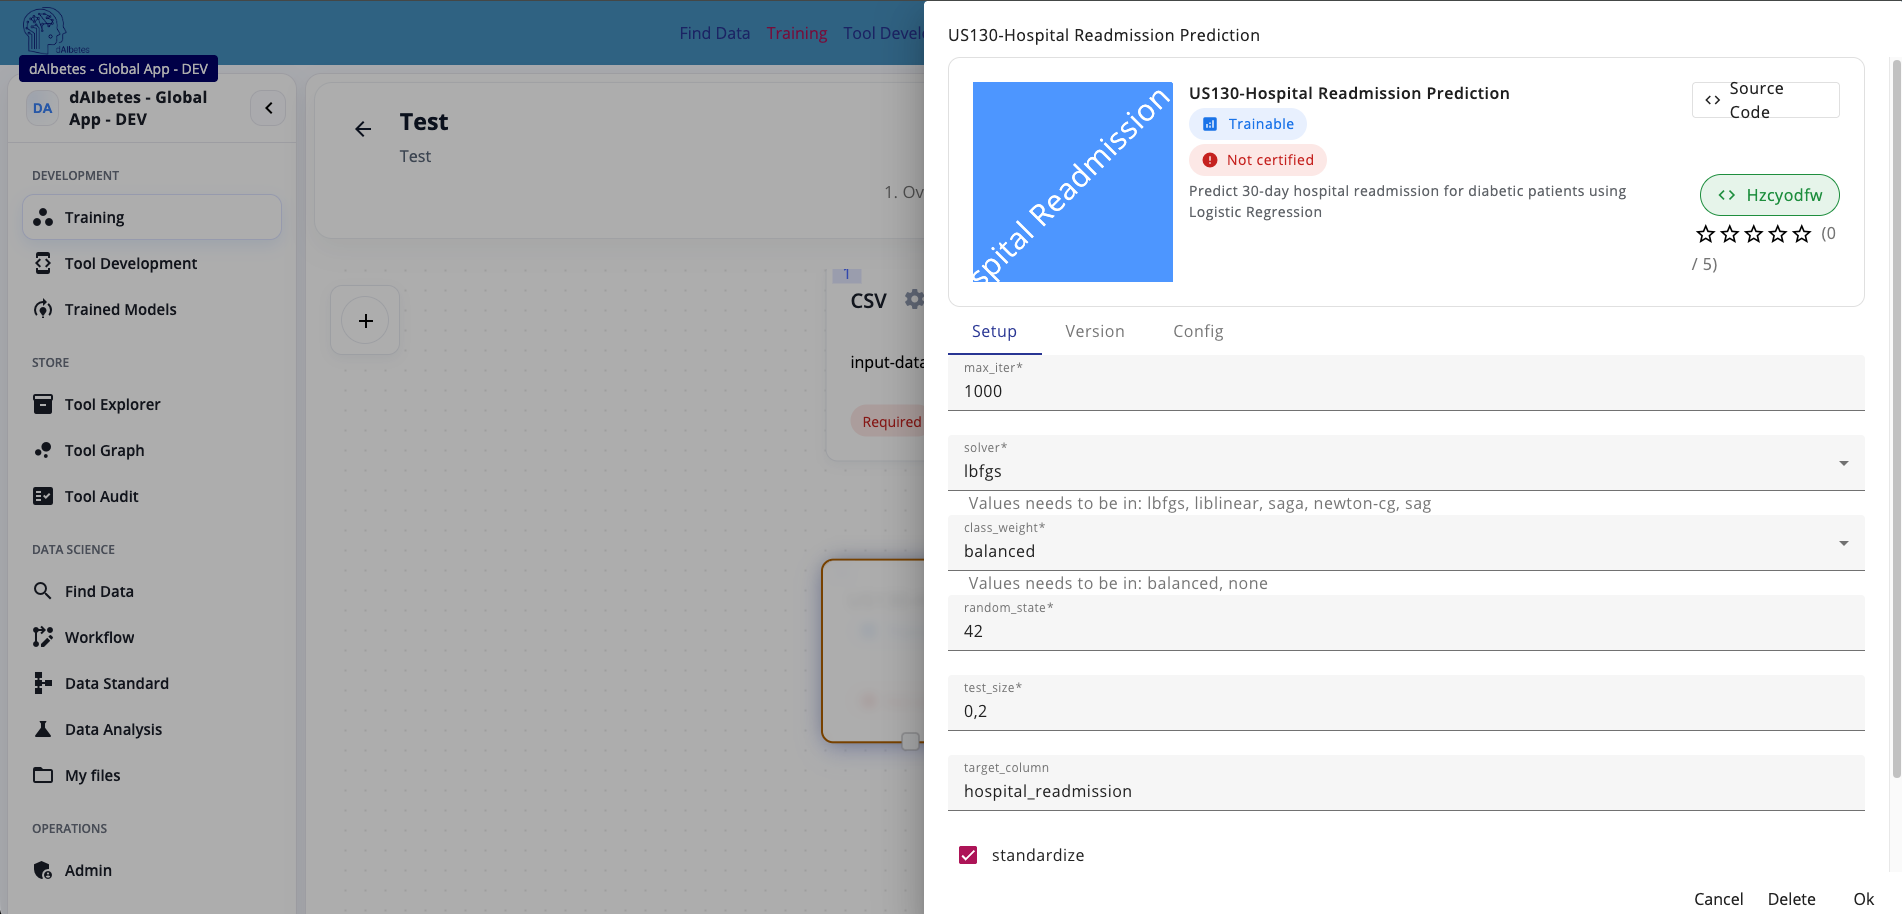
You can keep the default values for a first test run. Adjust them only if you understand how they affect the model training.
Click Ok to add the configured tool to the workflow.
Hyperparameters configured here are project-specific. They can override the defaults defined by the tool developer for this project workflow.
For the first workflow, use the defaults. Once the complete project can run successfully, tune hyperparameters in later experiments.
Step 7 — Connect the Workflow Nodes
After adding the tool, it appears on the workflow canvas.
Connect the output port of the CSV input node to the input port of the selected app. This tells the platform that the project data should be passed into the trainable app.
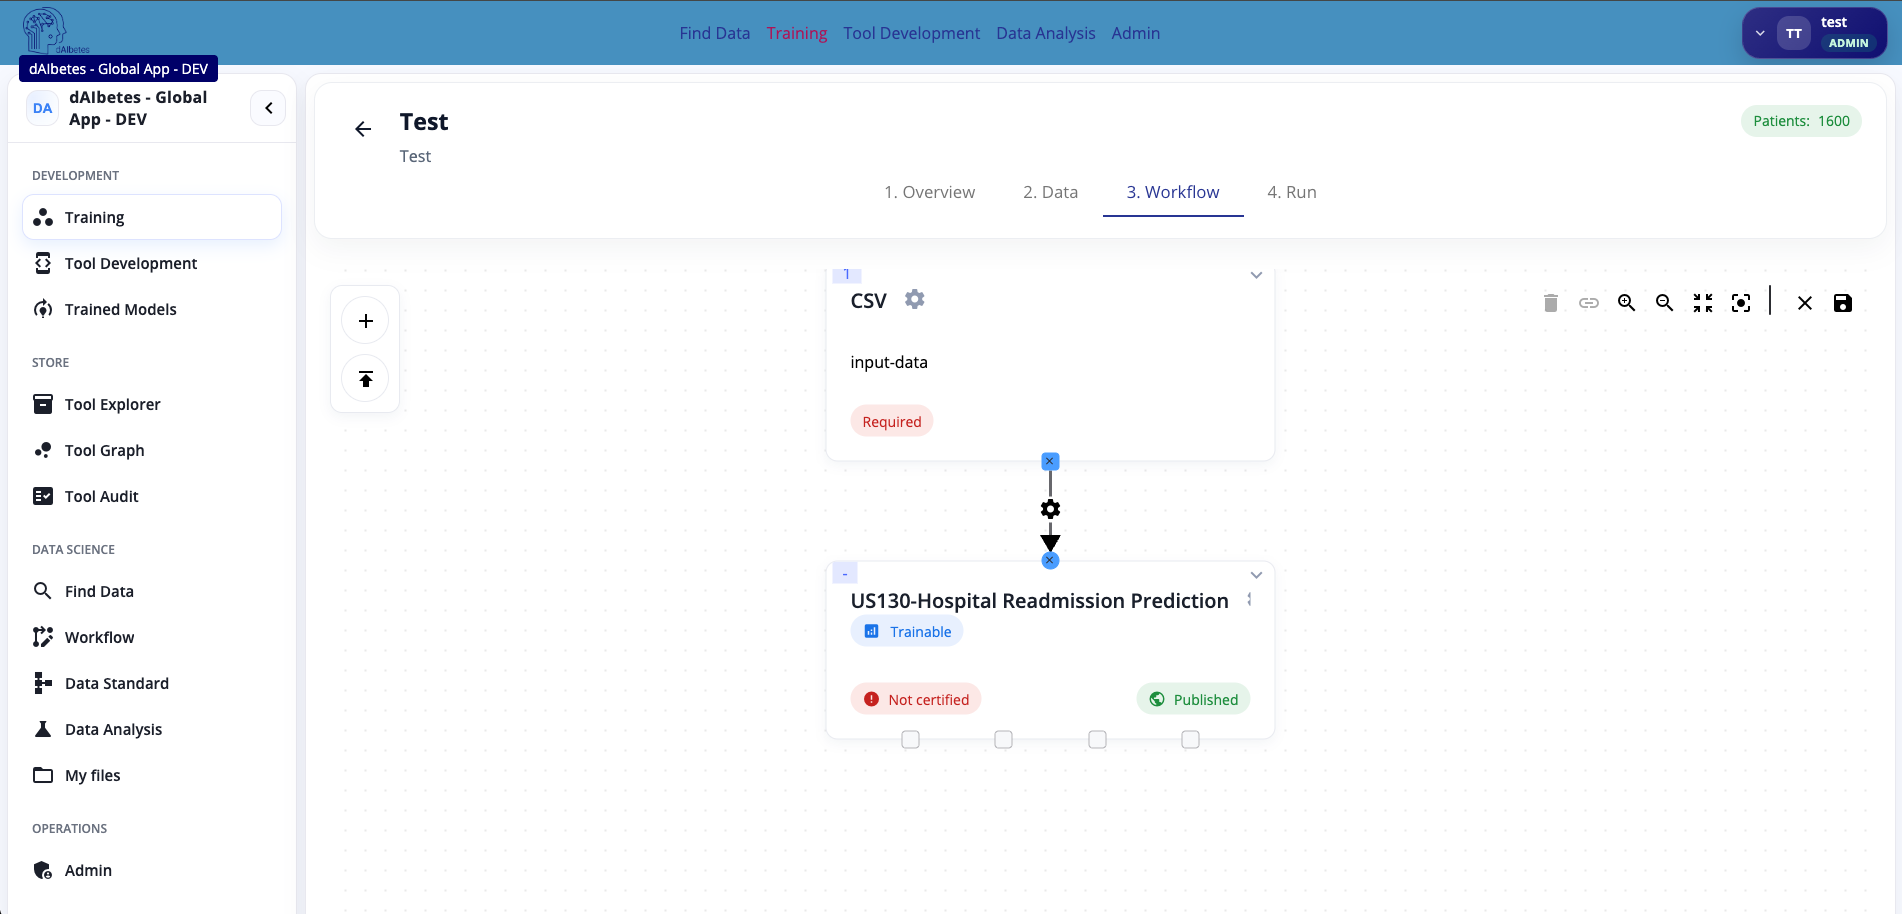
The connection defines the data flow:
CSV input-data → US130-Hospital Readmission Prediction